Art-Class.net
Ads
In this online guide about drawing a whole picture, I show you step-by-step how to draw my paperwarrior. The example is great for exercising and if you want to learn to draw or if you want to improve your drawing skills.
Don't let yourself deter if the picture appears to you as to difficult to draw! You know skill comes with practice ;-). If you just want to learn the basics of draing with coloured pencils, just visit the instruction "learn to draw with coloured pencils".
.jpg)
The paperwarrior presents a origami figure which was folded of a beverage carton - a pack of iced tea. If you are interested in how I got the idea of the Paperwarrior and how I have realised the drawing, you should see my instruction about how to create and realise own pictures.
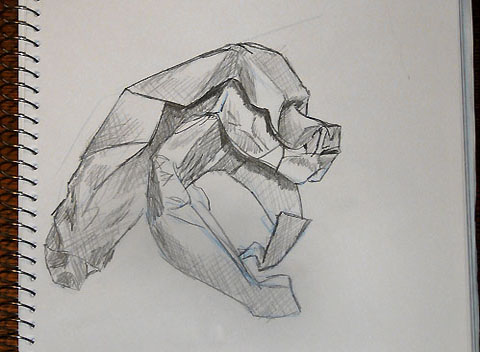
First I have to confess that I have accidentally erased the photos of the presketching from my camera memory card. Therefore, I start with the pictures of the half shaded drawing. But as compensation I present a small sketch of gorilla that I have drawn in advance:
After completing all the preparatory work and preparations I'm starting with drawing the picture.
First you have to draw a presketching on the paper (the drawing ground) which shows the contours of the drawing object - the origami gorilla. As already mentioned unfortunately I have no pictures for this step, but you can imagine the presketching as a fine drawing of the outlines without shades. I draw the lines only very slightly, so that the strokes are invisible later.
I read often that it's best to use a hard pencil for the presektching as it is not so dark. But I think that a soft pencil more suitable better as it doesn't leave furrows in the paper. Moreover it is easier to erase.
The presketching is drawn. Now you can start drawing the shadows. Ordinary I allways draw the shadows of the entire drawing object first (except for the background) and then I draw over it with the colours.
I draw the shadows with a black pencil. It works principle in the same way as drawing with a ordinary pencil. As finer you draw the shadows as better will be the overall result at the end. However it is not necessary to put to much effort in drawing the shadows as the entire area will be overdrawn with coloured pencils later. That means that detailed shadows will hardly be visible in the finished picture.
In the following pictures you can trace how the sketching is shaded step-by-step.
.jpg)
Notice that if you are a right-hander you should start drawing at best in the upper left corner. In this way you prevent that you wipe with the hand over your own drawing. A left-hander should always start drawing in the upper right corner of the drawing. Additionally I put always a piece of paper under my hand.
If you wipe too often or too heavily over the drawing the shadows will look blurred (that's valid also for ordinary pencil drawings, especially I you work with a soft pencil). If you have previously worked clean and darwn fine shadows, you will destroy a lot of your work!
.jpg)
I draw the areas which lie in the shadow dark black, while I leave lighted areas throughout white. By doing that a stronger light-dark contrast can be achieved and the image looks exciting.
.jpg)
You can draw some very dark or completely black shadows. Although at the end the picture should not look too dark, but you should not be too stingy with dark areas. In contrast to the dark areas you should also leave some parts free from shadows. But this is also a matter of taste.
.jpg)
As mentioned above, to dark shadows belong also light areas, if you want ot draw a picture with striking contrasts. In the event that a bright area already became too dark, you can brighten it up again with an eraser or even better an eraser pen. You should however make sure that you use a soft eraser (or Radierstift) which doesn't damage the paper. (More about eraser / erasing you can learn in my guide about drawing with crayons)
.jpg)
And that's the Paperwarrior after all shadows have been drawn. It almost hurts that I'll draw over the shading with the coloured pencils. Already the black-and-white drawing looks really good. But I guess it will look awesome with the colour.
.jpg)
This website is about how to draw and paint. You will learn to use pencil and brush and how to drawn and paint your own pictures.